Firmware and Driver Update Workflow for New Builds
A clear, structured workflow for updating firmware and drivers helps ensure stability and compatibility in a new PC build. This article outlines steps from initial hardware checks through final testing, focusing on motherboard, processor, memory, storage, graphics, cooling, and peripherals to reduce common issues and streamline troubleshooting.

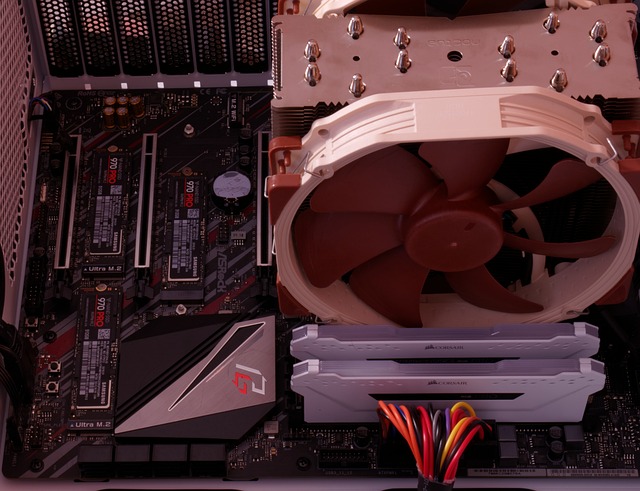
When assembling a new PC, planning firmware and driver updates early prevents compatibility issues and makes testing more efficient. Start by verifying all core components—motherboard, processor, memory, and storage—are correctly installed and supported by the chosen BIOS/UEFI and operating system. Document component models and current firmware versions where possible before connecting storage or peripherals. This preparatory step reduces the chance of repeated reboots, data loss, or mismatched drivers during later stages.
Motherboard and processor preparation
Confirm the motherboard model and the processor socket compatibility first. Check the motherboard’s support list for CPU microcode updates and note the current BIOS/UEFI version. If an out-of-the-box BIOS does not support a chosen processor, update firmware using the vendor’s recommended method (USB BIOS flashback, in-OS updater, or DOS-based tools). Where possible, flash BIOS/UEFI using a reliable power source and follow official instructions to avoid corruption. Keep an offline copy of the original firmware and the update files in case you need to roll back.
Memory and storage verification
Test memory modules with a tool such as MemTest86 before applying system-level driver changes to isolate hardware faults. Confirm RAM is seated in the correct slots to enable intended dual- or quad-channel operation. For storage, ensure drives use the intended interface (SATA, NVMe) and that motherboard firmware recognizes them correctly. Update storage controller firmware and drivers only after confirming drive health and backing up important data. If using RAID or advanced storage features, follow vendor guidance for controller firmware order and driver staging.
Graphics and peripherals setup
Install the graphics card and attach displays, then verify the GPU is recognized in firmware and the operating system. Download the latest stable driver packages from the GPU vendor and review release notes for compatibility with your OS and other components. For peripherals like network adapters, audio devices, and USB hubs, use vendor drivers if they add functionality beyond generic OS support. Avoid installing beta drivers unless required for specific hardware fixes, and keep driver installers and version numbers logged for easier rollback if needed.
Cooling, ventilation, and power checks
Confirm that cooling solutions and case ventilation meet thermal requirements for the processor and graphics card before stress testing. Update any firmware for smart fans, AIO pump controllers, or power delivery modules when provided by the manufacturer. Verify power supply connections are secure and that power delivery matches component specifications to avoid undervolting or unstable operation during driver or BIOS updates. Monitor temperatures and voltages during early firmware flashes and driver installations to detect issues early.
Firmware, drivers, and compatibility
Plan firmware and driver updates in stages: critical firmware (BIOS/UEFI, SSD firmware), then chipset and storage drivers, followed by graphics and peripheral drivers. Maintain a compatibility checklist that includes supported OS versions, recommended driver versions, and known conflicts between drivers. Document each update with timestamps and version numbers, and perform incremental tests after each stage. Below is a short list of common motherboard and GPU vendors and the services they provide for firmware and driver support.
| Provider Name | Services Offered | Key Features/Benefits |
|---|---|---|
| ASUS | BIOS/UEFI updates, chipset and peripheral drivers | Frequent firmware releases, utility tools for flashing and monitoring |
| MSI | Firmware updates, driver packages, diagnostic tools | Clear CPU support lists and flashing utilities like M-Flash |
| Gigabyte | BIOS releases, SATA/NVMe firmware support, drivers | Q-Flash, BIOS profiles, robust compatibility notes |
| Intel | CPU microcode updates, chipset drivers, storage firmware | Direct microcode patches and driver packs for platforms |
| NVIDIA | GPU drivers and firmware updates for select cards | Regular driver releases with detailed changelogs |
Prices, rates, or cost estimates mentioned in this article are based on the latest available information but may change over time. Independent research is advised before making financial decisions.
Assembly, testing, and troubleshooting
After updates, perform a staged validation: boot to BIOS/UEFI, confirm component detection, then install the OS and core drivers. Run stress tests for CPU, GPU, memory, and storage to validate stability and cooling. If instability occurs, revert the most recent firmware or driver change and test again to isolate the cause. Use vendor support forums and official diagnostic tools to interpret error logs. Keep a recovery USB or backup image to restore the system if a firmware flash fails or a driver introduces severe instability.
Effective firmware and driver management for new builds reduces unexpected failures and accelerates stable deployment. By documenting versions, updating in stages, and testing methodically—covering motherboard, processor, memory, storage, graphics, cooling, power, and peripherals—you create a reproducible workflow that simplifies troubleshooting and improves long-term compatibility.


